
- Get link
- X
- Other Apps
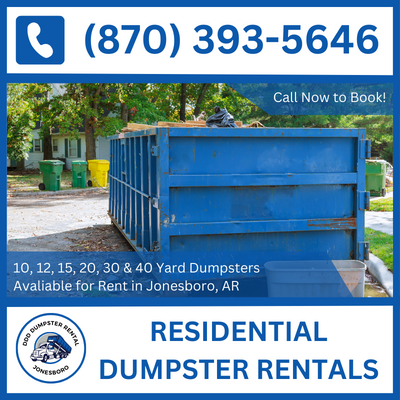
Maximizing Efficiency in DIY Projects: The Ultimate Guide to Dumpster Rentals
When embarking on a DIY home improvement project, whether it's a kitchen remodel, bathroom renovation, or landscaping overhaul, one crucial aspect that often gets overlooked is waste management. Efficiently handling the debris and clutter generated during these projects can make a significant difference in the overall success and stress levels of your DIY endeavor.
This is where dumpster rentals come into play. By providing a convenient and centralized location for disposing of waste materials, dumpster rentals can help keep your project site clean, organized, and clutter-free. They offer numerous benefits, such as:
- Saving time and effort on trips to the landfill
- Minimizing the risk of injury from handling and transporting debris
- Ensuring compliance with local waste disposal regulations
- Allowing you to focus on the task at hand without worrying about the accumulating waste
In this ultimate guide, we'll dive deep into the world of dumpster rentals and explore how they can streamline your DIY projects. From estimating waste volume and choosing the right dumpster size to maximizing space and adhering to regulations, we'll cover everything you need to know to make the most of your dumpster rental experience.
So, whether you're a seasoned DIY enthusiast or a first-time renovator, read on to discover how dumpster rentals can be a game-changer in your next project.

Planning Your DIY Project
Alright, folks, let's talk about the exciting world of DIY projects! Whether you're renovating your kitchen, transforming your bathroom, or giving your landscaping a facelift, the key to success lies in proper planning. Trust me, a little bit of preparation goes a long way in saving you time, money, and a whole lot of headaches.
First things first, let's identify the scope of your project. Are you tackling a single room or taking on the entire house? Here are a few common projects that homeowners like to sink their teeth into:
- Kitchen renovations: From updating appliances to installing new cabinets, these projects can be both rewarding and challenging.
- Bathroom remodels: Goodbye, outdated fixtures! Hello, spa-like oasis!
- Garage, attic, or basement cleanouts: It's time to reclaim your space and say goodbye to the junk that's been collecting dust for years.
Now that you've got your project in mind, it's time to estimate the volume of waste you'll generate. This is where things can get a bit tricky, but don't worry, we've got you covered. A good rule of thumb is to consider the type of materials you'll be removing and the size of the area you're working on. For example:
|
Project Type |
Estimated Waste |
|
Small bathroom remodel |
2-3 cubic yards |
|
Medium-sized kitchen renovation |
5-7 cubic yards |
|
Large garage cleanout |
10-12 cubic yards |
Keep in mind that these are just estimates, and your actual waste volume may vary depending on the specifics of your project.
Finally, let's talk about determining your project timeline. Be realistic about how long your DIY endeavor will take, and don't forget to factor in any unexpected setbacks (because let's face it, they're bound to happen). It's better to overestimate than underestimate when it comes to your timeline.
By taking the time to plan your DIY project properly, you'll set yourself up for success and minimize the stress that comes with home improvements. So, grab your tools, put on your thinking cap, and let's get ready to transform your space!
Choosing the Right Dumpster Rental
Now that you've got your DIY project all mapped out, it's time to talk about the unsung hero of home improvements: the mighty dumpster rental. Choosing the right dumpster can make a world of difference in keeping your project running smoothly and your sanity intact.
First up, let's dive into understanding dumpster sizes and capacities. Dumpsters come in a variety of sizes, each designed to handle different amounts and types of waste. Here's a quick rundown of the most common sizes:
- 10-yard dumpsters: Perfect for small projects like bathroom remodels or minor landscaping.
- 20-yard dumpsters: The go-to choice for medium-sized projects, such as kitchen renovations or garage cleanouts.
- 30-yard dumpsters: Ideal for larger projects, like whole-house remodels or major landscaping overhauls.
When selecting your dumpster size, it's essential to consider a few key factors:
- The type of waste materials you'll be tossing. Will you be dealing with heavy debris like concrete or bricks?
- The weight limits and restrictions imposed by the rental company. You don't want to get hit with unexpected overage fees!
To give you a better idea, check out this handy table:
|
Dumpster Size |
Typical Weight Limit |
Ideal Project |
|
10-yard |
2-3 tons |
Small remodels, minor cleanouts |
|
20-yard |
3-4 tons |
Medium renovations, garage cleanouts |
|
30-yard |
4-5 tons |
Large remodels, major cleanouts |
Next up, let's talk about rental duration and scheduling. Most dumpster rental companies offer flexible rental periods, typically ranging from a few days to a few weeks. It's important to estimate your project timeline accurately to avoid paying for extra days you don't need.
When scheduling your rental, be sure to plan ahead. Dumpster rental companies often have busy periods, especially during peak home improvement seasons. Aim to schedule your rental at least a week in advance to ensure availability.
Finally, don't forget to obtain a no-cost estimate from the rental company like DDD Dumpster Rental Jonesboro. This will give you a clear picture of the costs involved and help you avoid any surprise fees down the line.
By taking the time to choose the right dumpster rental for your DIY project, you'll be setting yourself up for a stress-free, efficient experience. So, go ahead and start comparing those rental options – your dream home improvement project awaits!
Preparing for Your Dumpster Rental
Alright, my DIY-loving friends, you've got your project planned and your dumpster rental selected. Now it's time to get your space ready for the big arrival! Trust me, a little preparation goes a long way in ensuring a smooth and efficient waste disposal process.
First on the agenda: identifying a suitable location for the dumpster. You'll want to choose a spot that's easily accessible for both you and the delivery truck. Consider factors like:
- Proximity to your work area
- Level and stable ground
- Clearance from overhead obstacles (think power lines and tree branches)
Once you've pinpointed the perfect spot, it's time to clear the area for delivery. Make sure there's plenty of room for the dumpster to be placed and removed without any hassle. If you're feeling extra fancy, you can even lay down some plywood or boards to protect your driveway or lawn.
Now, let's talk about permit requirements and local regulations. Depending on where you live and where you plan to place your dumpster, you may need to obtain a permit from your local government. Don't worry, though – most reputable dumpster rental companies will be happy to guide you through the process and help you navigate any red tape.
To make sure you're fully prepared, create a pre-delivery checklist:
- Choose a suitable location
- Clear the area for delivery
- Obtain necessary permits
- Notify neighbors of the upcoming dumpster arrival (optional but courteous)
By taking these simple steps to prepare for your dumpster rental, you'll be setting yourself up for a stress-free and efficient waste disposal experience. So, roll up your sleeves, get your space ready, and let's get this DIY party started!
Best Practices for Specific DIY Projects
Now that we've covered the basics of dumpster rentals, let's dive into some best practices for tackling specific DIY projects. Whether you're renovating your kitchen, revamping your bathroom, or decluttering your garage, these tips will help you make the most of your dumpster rental and keep your project running smoothly.
A. Kitchen and Bathroom Renovations
When it comes to kitchen and bathroom remodels, you'll likely be dealing with a mix of heavy and bulky materials, such as cabinets, countertops, and plumbing fixtures. To make your life easier:
- Break down large items, like cabinets and vanities, into smaller pieces for easier loading and space optimization.
- Separate recyclable materials, such as metal pipes and fixtures, from general waste to reduce your environmental impact.
- Consider donating gently used appliances, cabinets, or fixtures to local charities or habitat for humanity.
B. Landscaping and Outdoor Projects
Tackling an outdoor project? Whether you're installing a new patio or revamping your garden beds, here are some tips to keep in mind:
- Be mindful of the weight of landscaping materials, such as rocks, bricks, and soil. These items can quickly add up and exceed your dumpster's weight limit.
- Use tarps or plywood to create a temporary path from your work area to the dumpster to minimize damage to your lawn.
- Separate organic waste, like branches and plant matter, from non-organic materials for proper disposal.
C. Garage, Attic, or Basement Cleanouts
If you're finally ready to tackle that cluttered garage, attic, or basement, a dumpster rental can be a lifesaver. Here's how to make the most of it:
- Create designated areas for items you plan to keep, donate, and toss to stay organized and efficient.
- Use proper lifting techniques and equipment, like dollies or hand trucks, to avoid injury when moving heavy items.
- Take advantage of the dumpster's vertical space by stacking items safely and securely.
D. Deck or Shed Construction
Building a new deck or shed? Don't let waste materials clutter up your workspace. Follow these tips:
- Place your dumpster rental close to your construction site for easy access and disposal.
- Break down large pieces of lumber or plywood into smaller, more manageable sizes.
- Separate salvageable materials, like unused lumber or hardware, for future projects or donations.
E. Workspace Decluttering
Finally, if you're looking to declutter your workspace, whether it's a home office or a craft room, a dumpster rental can help you make a fresh start. Keep these tips in mind:
- Sort through your items carefully, separating them into piles for keeping, donating, and tossing.
- Shred or safely dispose of sensitive documents to protect your personal information.
- Recycle old electronics, such as computers or printers, through local e-waste programs.
By following these best practices for your specific DIY project, you'll be able to maximize your dumpster rental's efficiency and minimize the stress and clutter that often comes with home improvements. So, roll up your sleeves, grab your tools, and let's get to work!
Dumpster Rental Safety
Alright, folks, let's take a moment to talk about everyone's favorite topic: safety! I know, I know, it's not the most exciting part of your DIY project, but trust me, it's essential. When you're dealing with a dumpster rental, there are a few key things to keep in mind to ensure that you, your loved ones, and your property stay safe and sound.
First up, let's discuss proper lifting techniques. I know you might feel like a superhero when you're tackling your home improvement project, but even superheroes need to be careful when lifting heavy objects. Remember to:
- Bend at your knees, not your back
- Keep the object close to your body
- Avoid twisting or jerking motions
Next, let's talk about wearing appropriate safety gear. I promise, you'll still look stylish even with a hard hat and gloves on. Make sure to protect yourself with:
- Hard hats for overhead hazards
- Gloves to prevent cuts and splinters
- Steel-toed boots for heavy lifting
Now, let's address the elephant in the room: keeping children and pets away from the dumpster. I know your little ones and furry friends might be curious about this new addition to your property, but it's crucial to keep them at a safe distance. Make sure to:
- Educate your kids about the dangers of playing around the dumpster
- Keep pets leashed or indoors during the rental period
- Never allow anyone to climb inside the dumpster
Finally, let's discuss the safe disposal of hazardous materials. Some items, like batteries, electronics, and paint, require special handling and cannot be thrown in your regular dumpster rental. Be sure to:
- Check with your local waste management company for guidelines on disposing of hazardous materials
- Separate these items from your regular waste
- Follow proper disposal procedures to protect the environment and public health
By keeping these safety tips in mind, you'll ensure that your DIY project goes off without a hitch, and everyone stays happy, healthy, and injury-free!
Conclusion
As we've explored throughout this ultimate guide, dumpster rentals are a game-changer when it comes to maximizing efficiency in your DIY projects. By providing a convenient and centralized solution for waste management, dumpster rentals can help you:
- Keep your project site clean, organized, and clutter-free
- Save time and effort on trips to the landfill
- Ensure compliance with local waste disposal regulations
- Focus on the task at hand without worrying about accumulating waste
Whether you're tackling a kitchen renovation, landscaping overhaul, or garage cleanout, a dumpster rental can streamline the process and minimize stress. By following the best practices outlined in this guide, such as choosing the right size, maximizing space, and prioritizing safety, you'll be well on your way to a successful and efficient DIY project.
So, what are you waiting for? Embrace the power of dumpster rentals and take your DIY game to the next level!
Comments
Post a Comment